

.webp)


July 1-27, 1942
The Allies dig in for the First Battle, flanked by the Mediterranean and the Quattara Depression. However, this ends in a stalemate.
 Experience the dynamic campaign in game with
  Find out more

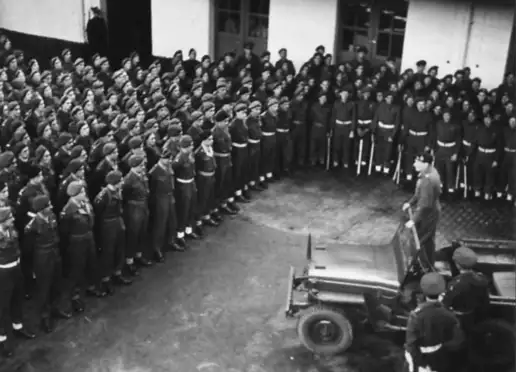
Expert input from historian and author
Professor Simon Ball
El Alamein was a battle of blistering heat, biting sandstorms, and brutal combat. It pitted the ‘desert fox’ Erwin Rommel and his notorious Panzerarmee Afrika, against the resilient Desert Rats of the British Eighth Army.
For the Allies, victory was essential. Threatened with almost total annihilation, they dug in and fought a grim battle of attrition against the fascist war machine.
But how did El Alamein actually play out during WW2? In this guide, we’ll talk you through the background, the battles, and the battalions at its heart.
In 1940, as the Axis juggernaut tore through Europe and the Atlantic, the Allies found a glimmer of hope.
Italy had declared war on Britain and France, and invaded Egypt. But the large Commonwealth garrison stationed there swiftly repelled fascist dictator Benito Mussolini’s forces, pushing them back to the Italian colony of Libya.
It seemed that Britain’s strategic foothold in the eastern Mediterranean, with its rich oil fields and vital Suez Canal shipping route, was safe – for now.
Any optimism proved to be short-lived, however. In February 1941, Erwin Rommel’s Panzerarmee Afrika landed in Tripoli, at roughly the same time Winston Churchill withdrew many of his troops to fight in Greece.
Rommel was a famed commander buoyed by recent victories in France. His wily, tactical genius on the vast deserts of North Africa would earn him a new nickname – the ‘desert fox’.
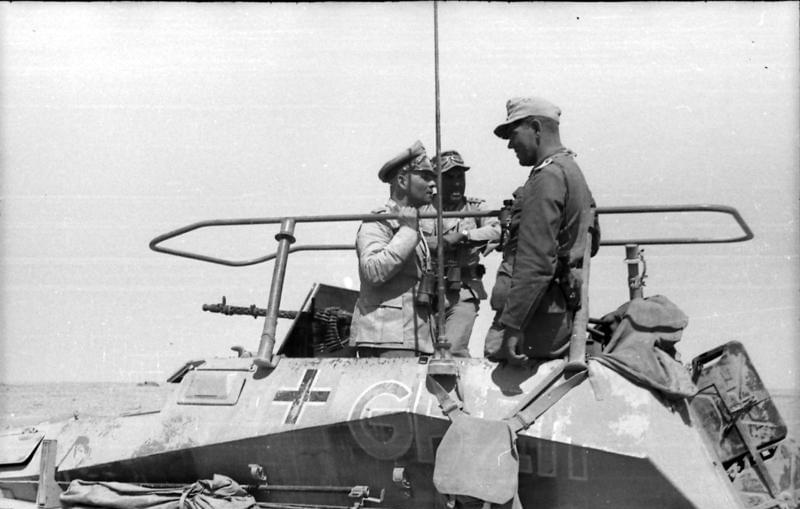
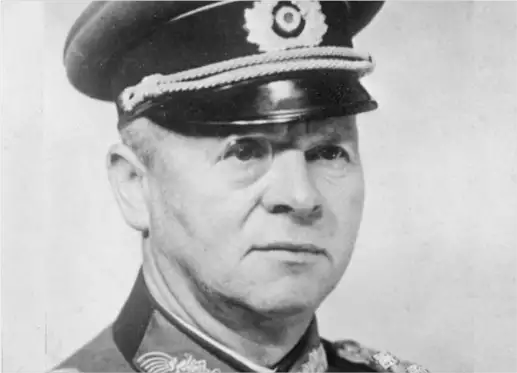
Erwin Rommel
in his Sd.Kfz. 250/3 command halftrack
Bundesarchiv, Bild 101I-443-1589-07 / Zwilling, Ernst A / CC-BY-SA 3.0
After arriving in Libya, Rommel quickly repelled the Allies back into Egypt. He outflanked and outfought them at every turn using cunning manoeuvres, anti-tank weaponry, and audacious offensives.
The Allies left a force of mainly Australian troops in the port of Tobruk. These brave soldiers denied Rommel access to the Mediterranean, thanks to some tenacious guerrilla combat.
Back in Egypt, the Allied Forces regrouped as the Eighth Army under the command of Sir Claude Auchinleck. These troops then launched a counteroffensive – known as Operation Crusader – to relieve the besieged ‘rats of Tobruk’, who had held out against Rommel’s bombardment for almost eight months.
Before long though, the Eighth Army again suffered a series of crushing defeats. The survivors scrambled in disarray to prepare for battle at El Alamein, a small Egyptian railway halt on the Mediterranean coast – by car, foot, or any way they could.
Professor Simon Ball, of the University of Leeds, notes that the Allies were now in a state of “rear echelon panic”. After all, the Axis were just 70 miles from Alexandria. From there, they could easily seize the Suez Canal and Persian oil fields – the lifeblood of the Allied war effort.
Fearing the imminent arrival of German and Italian troops, the Mediterranean fleet evacuated Alexandria while the British army lit “a bonfire” of sensitive documents in Cairo. Train station platforms heaved as British and Commonwealth officials and their families fled the Axis advance.
Mussolini was even said to have landed in Libya to prepare a victory parade in the Egyptian capital. With a new defensive line planned in Palestine, Axis victory in North Africa seemed all but certain. But there was to be a defining twist in the tale.
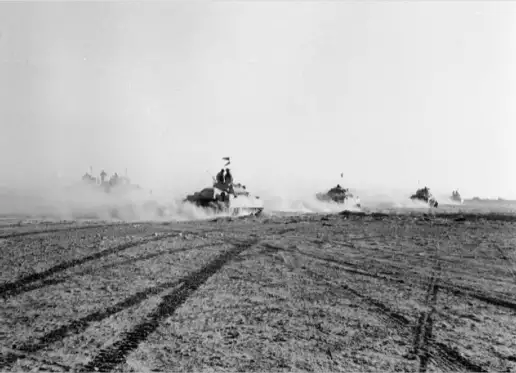
Rommel in North Africa June 1942
July 1-27, 1942
The Allies dig in for the First Battle, flanked by the Mediterranean and the Quattara Depression. However, this ends in a stalemate.

October 23, 1942
The Second Battle begins. Allied forces strike with an artillery barrage, while infantry units create two channels in the minefields.
October 25, 1942
Panzerarmee General Georg Stumme dies during battle, leaving the Axis without a commander.
October 26-31, 1942
General Bernard Montgomery continues ‘crumbling’ away at Axis defensive positions, in a grim phase of the battle known as the ‘Dogfight’.
November 1-4, 1942
The Allies pursue their final attack with ‘Operation Supercharge’, leading to a critical breakthrough after days of brutal resistance and many casualties.
After their chaotic stampede back to El Alamein, Auchinleck and the Eighth Army dug in.
Up until now, Rommel had used the wide, open spaces of the desert to his advantage – sweeping in to attack the Allies from the rear. But at El Alamein, the Allies had geography on their side.
That said, Auchinleck’s determined counterattacks proved equally fruitless. Though the Allied troops had halted the Axis advance, they were unable to dispel them entirely. A long stalemate ensued, where both sides had time to regroup and refuel.
Due to his failure to defeat Rommel’s forces, Churchill dismissed Auchinleck from his position. He was eventually replaced by the energetic but controversial British commander Bernard Montgomery, or ‘Monty’ as he was known to the troops.
The stage was set for a more decisive rematch – the Second Battle of El Alamein.
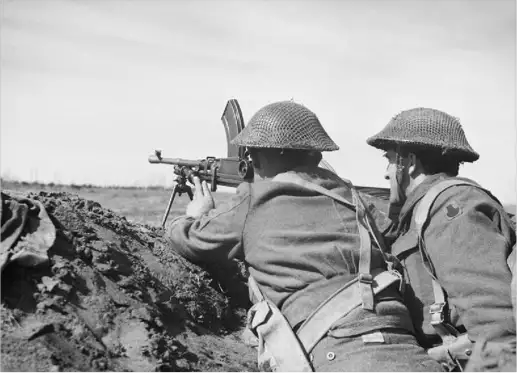
British infantry 17 July 1942
manning a sandbagged defensive position near El Alamein
The Second Battle of El Alamein saw the Axis powers take the defensive against the Allies. Here’s how the two sides faced off
The El Alamein line ran for 40 miles from the coast to the Qattara Depression. To the north were divisions from Australia, New Zealand, South Africa, and the United Kingdom, also incorporating troops from India, Sri Lanka, and Poland. To the south, Free French and Greek brigades bolstered British infantry units, while British armoured divisions formed the rear-guard.
Learn more: 'The Tanks of El Alamein and the Desert Wars'
“One of the things to note about the battle,” points out Professor Ball, “is that although the British Eighth forces have a two to one superiority… the air forces are about even.
“So, this isn’t like some of the later battles of the Second World War, in which the Allies have uncontested air superiority.”
The Axis forces during the 2nd battle of El Alamein did however continue to face major supply issues and – unlike their previous desert engagements – they now needed to defend, rather than attack.
To prepare for the Allied advance, Rommel built ‘Devil’s Gardens’: a deep, complex and intimidating network of anti-tank and anti-personnel mines, twisted with barbed wire and backed by anti-tank guns.
Professor Ball notes the sheer scale of the Axis defences:
“There are about 450,000 mines planted along the front line. So, in order to get to the Germans and Italians, the British forces have to cross these mine fields.”
To finally drive Rommel and the Axis out of North Africa, the Allies would require courage, skill, and steely determination.

Deployment of forces on the eve of battle, October 23rd, 1942

Like many battles in the Second World War, troops from across the globe fought at El Alamein.
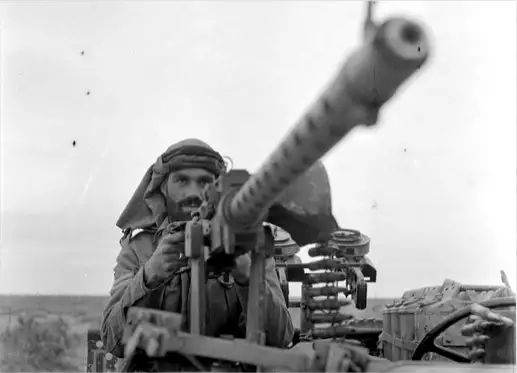
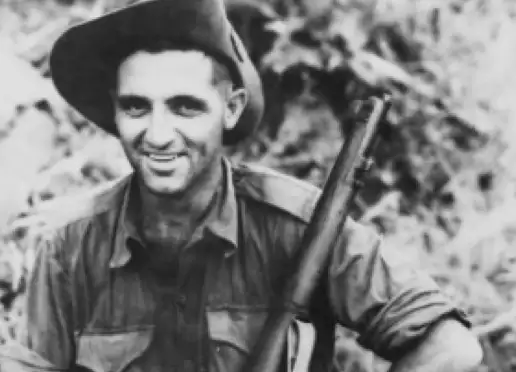
Cpl John Henderson of the Scots Guards
The Desert Rats were a British armoured division who faced off against Rommel’s forces. They had seen action in Africa from the very beginning of the invasion, and key to their success was the input of Major General Sir Percy Hobart. His outlandish tank theories and modifications helped break new ground against the notorious Panzerarmee.
.webp)
The 9th australian division at gaza airport being praised for their part in the battle
The nickname of these legendary troops started out as mockery on the part of Nazi radio propagandist ‘Lord Haw Haw’. However, it was soon wielded by the ‘Rats’ as an ironic badge of honour.
They fought a brave guerrilla war against the Axis in the underground passages and caves of Tobruk. There, they were proud to play the quick-witted rodents to Rommel’s predatory fox.
The rats were largely made up of 9th Australian Division fighters, many of whom went on to fight again at El Alamein.
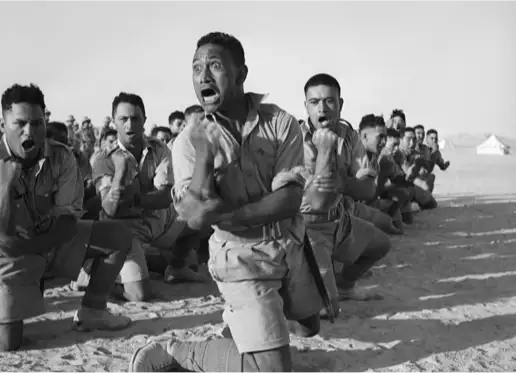
Members of the Maori battalion performing a haka in Egypt, July 1941
Prior to 1914, the Māori people had been barred from army service by the British Empire, who at that time controlled New Zealand. But the fearlessness of the 750 or so volunteers at El Alamein became legendary, as did their skill with a bayonet. It is said that they even earned the respect of Rommel himself.
Fighting against fascism abroad, and for their social status at home, the Māori forces suffered heavy casualties at the Battle of El Alamein (far higher than the average New Zealand infantry battalion). Despite this, their bravery in the conflict helped pave the way for employment opportunities and social mobility in New Zealand after the war.

Download the game now and see how the battle unfolded
The Second Battle of El Alamein relied on the leadership of a number of key figures.
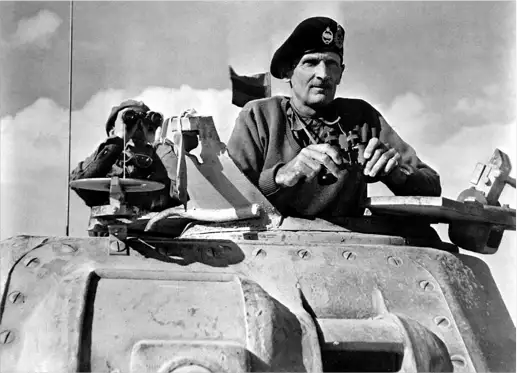
Montgomery in a Grant tank in North Africa
Field Marshall Bernard Law Montgomery – or ‘Monty’ as he was affectionately known – proved to be an efficient counterpoint to the less effective leadership of Auchinleck.
A bold showman, fond of fighting talk and adept at media performances, Monty quickly boosted Allied morale. Making a nod to the world of cricket, he even promised to hit Rommel “for six out of Africa”.
Nonetheless, Montgomery resisted a quick attack on Rommel’s forces, and instead dedicated time to training, ordering, and improving supply levels and physical fitness. When asked which three generals he most admired, he famously quipped: “the other two would be Alexander the Great and Napoleon”.
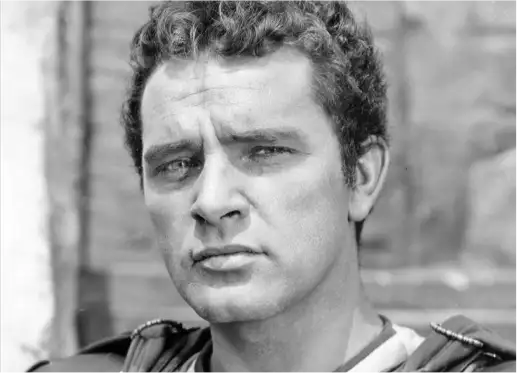
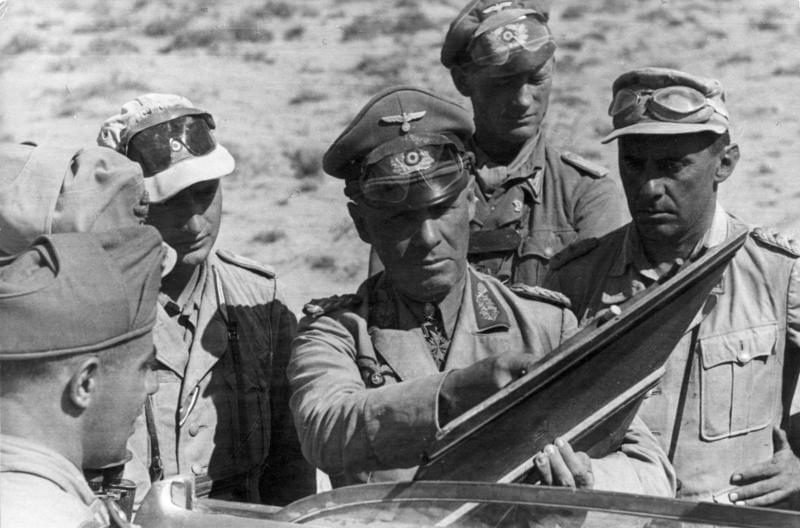
General Erwin Rommel
and his staff observe troops of the 7th Panzer Division practising a river crossing at the Moselle River in France in 1940.
Rommel commanded huge respect from both sides of the conflict. To British troops, he was known to ‘fight a good fight’ and was said to be indifferent to the more extreme elements of Nazi ideology.
In combat, he was known for his wily, cunning, and aggressive manoeuvres, which made him a a bona fide celebrity in Germany and across the world.
His hands-on style meant he led firmly from the front – ushering his troops from a tank or armoured command vehicle. By the time of the second battle, however, years of desert combat had taken its toll. Rommel was even sent back to Germany to recover in a sanitorium.
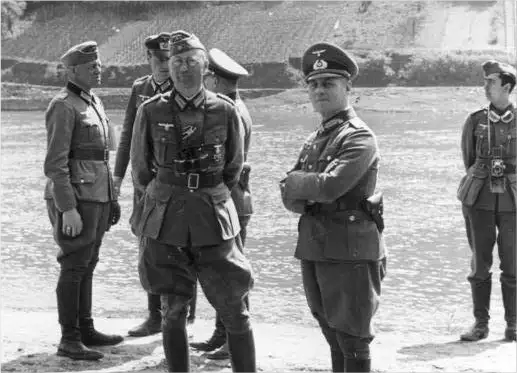
Georg Stumme
Rommel’s replacement, Georg Stumme, was known as a measured alternative to his frenetic, daring predecessor. He was a competent general who followed Rommel’s plans closely in his absence.
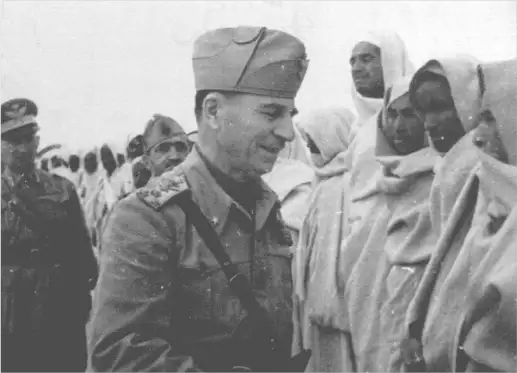
Ettore Bastico
in North Africa
Bastico was an Italian fascist military leader and theoretician, who had previously seen action in the Italo-Abyssinian Conflict and the Spanish Civil War. Nominally the overall commander of all Axis forces in North Africa, he was nonetheless effectively cut out of the chain of command. Instead, it is said that the German-Italian forces at El Alamein continued to take their orders from Rommel.
The 2nd battle at El Alamein saw the Axis troops demoralised, depleted, and exhausted. Their intelligence capacity – which had been exceptional up until now due to the presence of armed reconnaissance units in the open desert – had been largely destroyed.
Professor Ball notes that Stumme was effectively going in blind. At the same time, British intelligence was blossoming at Bletchley Park back in England, and feeding communications directly to Cairo. This helped the British cut off Axis supply routes, isolate their forces, and stay one step ahead of the enemy.
In short, warfare was about to become truly modern.

On a clear night on the 23rd of October 1942, the Allies took their first steps towards victory at El Alamein.
Operation Lightfoot started with a heavy artillery barrage across the 40-mile Alamein line, combining general bombardment with precision targeting. Infantry units then advanced on foot to create two channels in the minefields for artillery to follow.
It is worth noting that while El Alamein is often thought of as something of a ‘tank battle’, infantry played a crucial, prominent role in Allied success. As anti-tank mines only detonate at a certain weight, soldiers could walk across them safely and provide cover for engineers to defuse a five-mile route. By 2am, tanks then began to advance across enemy lines.
However. progress was hampered by traffic jams towards the rear of the forces, and chaotic hand-to-hand fighting at the front. The Allied troops were caught in the ‘Devil’s Gardens’ under heavy fire. Montgomery called this brutal battle of attrition “crumbling”.
According to Professor Ball, this was the most chaotic, dangerous moment in the battle:
“Now you have the infantry of the 7th Armoured Division caught between two minefields, and they're ordered not to withdraw, so they're stuck.
“And so, for about 18 hours, essentially, they're not moving, but they're under very heavy fire from Italian artillery and mortars, and they're taking heavy casualties. Most of the stories are incredibly harrowing because they're about people being killed and unable to fight back. It's a story of this incredible suffering.”
Montgomery planned diversionary tactics to the south to facilitate a stronger advance in the north. But by dawn, they had made little progress. In effect though, their attack had still managed to stun the enemy. German and Italian communications became panicked and erratic.
Things were about to get even worse for the Axis too. When General Stumme received his morning report, he went to the front to see for himself what was happening, where he came immediately under Allied fire and died.
Whether it was down to a bullet from the attacking Australian units, or – as it is sometimes alleged – a heart attack at the sheer chaos of the scene, no one truly knows. But the Axis were now without their field commander – and would be for the best part of a day.
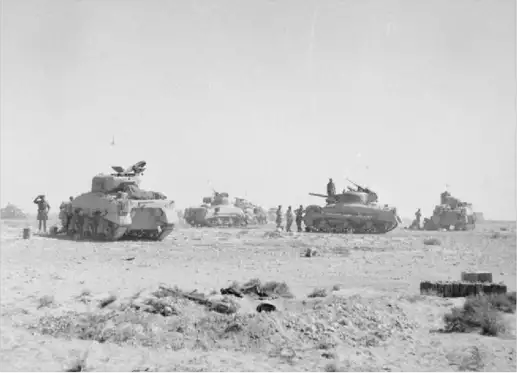
British tanks advance to engage German armour
Once the death of Stumme was confirmed, a swift counteroffensive from German and Italian forces aimed to bog down Allied progress.
But it was arguably too late. The Allies had now breached a six-mile-wide and five-mile-deep gap in the Axis line, and advancing British tanks were able to fight back. Montgomery focused his efforts to the north, to inject new energy and progress into the confrontation.
Grim, drawn-out tank warfare raged for a week – a part of the battle variously known as ‘eating the guts’ or the ‘dogfight’ by Montgomery. Both forces captured and recaptured territory without breaking any new ground.
Axis supplies were running low – and Bletchley Park knew it. Churchill was becoming impatient. He wanted to know why Montgomery and his troops weren’t ploughing through the German and Italian lines.
When Rommel returned from the sanitorium, he found a fighting force low on ammo and fuel. While the desert fox did his best to boost morale, he could do little to change the course of the battle – though he did pull divisions up from the south to mount a stubborn defence against the Allies’ slow, steady advance.
Meanwhile, an Australian force sought to capture the Axis position of Thompson’s Post, close to the coastal railway. From there, they aimed to cross to the coast road and attack the rear of the Axis troops. Despite numerous enemy counterattacks, they succeeded.
Rommel was becoming desperate. Meanwhile, Montgomery was about to launch a new offensive – one that would prove a decisive blow against the Axis in North Africa.

“The battle is going very heavily against us. We're being crushed by the enemy weight... We are facing very difficult days, perhaps the most difficult that a man can undergo”.
Erwin Rommel
Aptly named and powerfully effective, Operation Supercharge was the hammer blow that broke through the remainder of the Axis force. The plan was to drive the fight out of the narrow bottleneck that had been so important to the Allied defence in the first battle of El Alamein. In doing so, they could then outflank the enemy and capture their supply lines.
For Rommel, all was lost. He ordered a retreat – and his message was picked up at Bletchley Park. Montgomery pushed forward hoping for a swift conclusion to this gruelling battle, but the codebreakers back in Britain didn’t pick up Hitler’s response – which was for Rommel’s forces to ‘stand and die’.
The Allies instead came up against brutal resistance from the Axis. Hard fighting persisted on the 3rd of November, with many casualties.
But the trajectory of the battle was now inevitable. Rommel was out of tanks and ordered a second retreat, as Montgomery’s final offensive cleared the remaining German and Italian units to reach open desert.
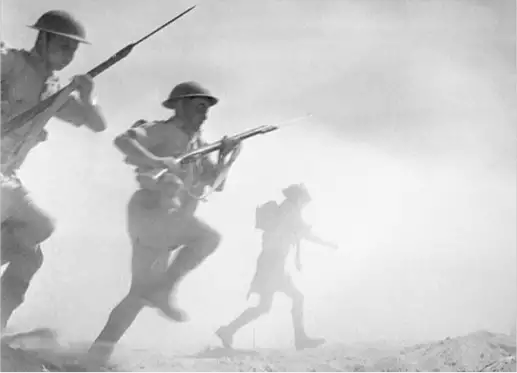
British infantry advances through the dust and smoke of the battle

For the Allies, the Second Battle of El Alamein resulted in around:
For the Axis, the human impact was even more dire:
Today, it’s important to see this battle through the lens of advancing technology and tactics. British intelligence, aircraft and strategy proved far more advanced than that of the Germans, and helped them to gain the upper hand. They fought smartly, limited casualties, and utilised air power instead of throwing vast land forces into the conflict.
As Professor Ball summarises:
“This is the tipping point in which warfare itself changes… It’s the moment that the Allied coalition master modern warfare, and the moment that the Germans and Italians demonstrate they cannot master modern warfare.”
Despite the many deaths and casualties suffered during the battle at El Alamein, the Axis powers continued to fight in North Africa until 1943 – attempting to wage a war on two fronts against the newly arrived US troops landing as part of Operation Torch.
But for the Allies, particularly Britain, the morale boost of El Alamein was incalculable. It was seen as a major turning point in British and Commonwealth fortunes, and would be their only major victory without the input of the Americans.
Churchill’s victory speech at El Alamein was cautiously optimistic:
“Now this is not the end. It is not even the beginning of the end. But it is, perhaps, the end of the beginning”.
From the beaches of Normandy to the slopes of Monte Cassino, the Allies would fight many more battles and mourn many more deaths over the next three years.
Meanwhile, in Eastern Europe, the Nazis had secretly begun to enact one of the most atrocious and unimaginable crimes in human history – the Holocaust. Total victory against fascism could not come fast enough.
El Alamein stayed the steady advance of Axis forces in North Africa, keeping the Suez Canal in Allied hands and preventing the full-scale invasion of Egypt and the Middle East. Along with Stalingrad, it marked the first major Axis setbacks of the war – and pushed them into retreat.
The 9th Australian Division fought in the first and second battles of El Alamein. The division had previously seen gruelling action in the Siege of Tobruk – and were known affectionately as the ‘Rats of Tobruk’.
Around 4,800 Allied troops are believed to have died in the battle of El Alamein, comprising soldiers from not only Britain but across the Commonwealth too.
The Second Battle of El Alamein was quite possibly the most important North African battle of WW2. This marked the point where the tides turned against the Axis forces in North Africa, and across the globe.
American forces landed in North Africa in November 1942. This was part of Operation Torch, and marked the first mass involvement of US troops in the European and North African theatres of the war.
The First Battle of El Alamein began on 1st of July, 1942 and concluded on the 27th of July, 1942.
The Second Battle of El Alamein started on the 23rd of October, 1942 and concluded on the 11th November, 1942.
Forces from Germany, Italy, Great Britain, and the Commonwealth all fought in the famous battle.
El Alamein is in Egypt, 70 miles west of Alexandria, on the Mediterranean coast.
The First Battle of El Alamein ended in a stalemate. But the Allied powers won a decisive victory in the second battle.
In the Second Battle of El Alamein, there were around 37,800 dead or wounded on both sides.
It was the first major Axis defeat in North Africa, and prevented Germany seizing key strategic targets.
Professor Simon Ball
Simon Ball is a Professor of International History and Politics at the University of Leeds. His 2016 book Alamein: Great Battles draws on intensive research of contemporary sources and declassified info around the event.
Interview with Prof Simon Ball
https://www.nam.ac.uk/explore/struggle-north-africa-1940-43
https://www.nam.ac.uk/explore/battle-alamein
https://www.britannica.com/topic/Desert-Rats-World-War-II
Barr, Niall (2005) [2004]. Pendulum of War: The Three Battles of El Alamein. London: Pimlico.
https://defenceindepth.co/2017/07/03/remembering-the-crucial-days/
https://www.historylearningsite.co.uk/world-war-two/war-in-north-africa/the-battle-of-el-alamein/
https://www.thoughtco.com/first-battle-of-el-alamein-2360453
https://www.nam.ac.uk/explore/bernard-montgomery
https://www.britannica.com/biography/Bernard-Law-Montgomery-1st-Viscount-Montgomery
https://www.historyhit.com/8-tanks-second-battle-of-el-alamein
Source: Playfair, Major-General I. S. O.; et al. (2004) [1st. pub. HMSO 1966]. Butler, J. R. M. (ed.). The Mediterranean and Middle East: The Destruction of the Axis Forces in Africa. History of the Second World War United Kingdom Military Series. Vol. IV (Naval & Military Press ed.).
https://bock-schroeder.com/el-alamein
https://www.britannica.com/biography/Percy-Hobart
https://rslqld.org/news/latest-news/searing-pain-in-el-alamein-for-one-of-the-rats-of-tobruk
https://nzhistory.govt.nz/war/maori-in-second-world-war
https://nzhistory.govt.nz/war/maori-and-the-second-world-war/impact
https://comandosupremo.com/ettore-bastico/
https://www.bbc.co.uk/history/worldwars/wwtwo/ff5_second_alamein.shtml
The Phantom Army of Alamein: The Men Who Hoodwinked Rommel Rick Stroud page 211–212
©Relic Entertainment. All rights reserved. Developed by Relic Entertainment. Entertainment, the Relic Entertainment logo, Company of Heroes and the Company of Heroes logo are either registered trademarks or trademarks of Relic Entertainment. Relic Entertainment is registered in the U.S. Patent and Trademark Office. All other trademarks, logos and copyrights are property of their respective owners.